Search this Blog
Sadie's Blogs and Website

For posts 2006-2010
please visit
sadievaleri.blogspot.com

Sadie’s current site is at
SadieValeriAtelier.com

UPDATE February 1, 2021

I have recently discovered that unfortunately this Squarespace blog has failed to maintain most the images for older posts on this blog. Luckily, the original Blogger version is still live at sadievaleri.blogspot.com and all the posts and images from 2006-2010 are still visible there.

For my current artwork, teaching, and blog please visit Sadie Valeri Atelier.


Entries in painting (203)

Sunday
Nov292009

Sterling Boat: Session 9


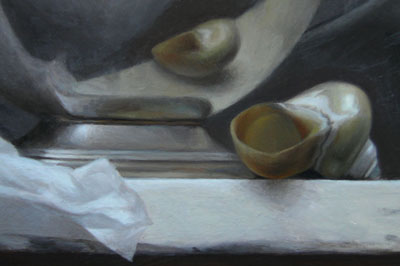
Sterling Boat - DETAIL - work in progress
oil on panel

Today was another 4-hour session and I worked mainly on the spout, handle, and top edge of the pitcher. I managed to take a better photo and so I replaced the photo in yesterday's post too so the color is easier to see. (I didn't send out notifications about yesterday's post because the photo was so bad, so if you are just seeing it today that's why).

In yesterday's post I mentioned "value bracketing" and got a lot of questions about that.


What I mean by value bracketing is taking the time in the first stages of a drawing or painting to block in the value range of each particular area, and then as the drawing progresses, to stay within that initial value range without fail. Some artists assign numbers to values and codes to color, to identify a range and remember to paint or draw within a particular bracket.

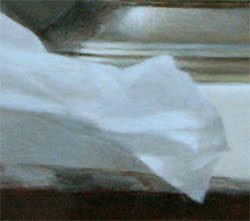
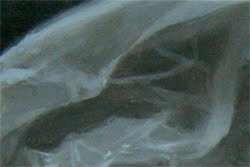
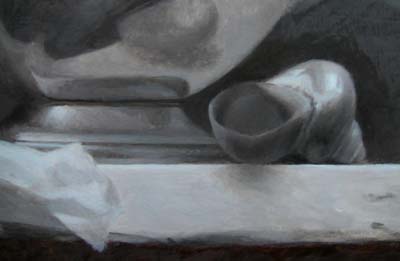
For an example of two different areas I mentally bracketed in my current painting, you can see these two areas of wax paper in my current painting are in completely different value ranges:


Top left corner - DARK value range

Low middle area - LIGHT value range

As the painting develops there will be days when I am working on one of these small areas for a whole session, without ever comparing it to another area, so it is tempting to exaggerate the value range in a given area. If I am not disciplined to stay within the value range I've already determined is appropriate, I will make the lights too light in the dark areas, and the shadows too dark in the dark areas.

In the light area of my wax paper in the cropped detail above, the shadows in the creases of the wax paper are bare whispers. In real life it looks like there are huge differences between the shadows in the creases and the bright highlights of white light reflecting off neighboring areas. If I attempt to "copy" that value jump I see, I will make the shadows far too dark and I will destroy the illusion of light in the whole piece.

Our eyes can perceive a much wider range of color and value than paint can ever depict. For example, pure white paint directly from the tube is nowhere near as bright at the lightest highlights on my subject. That's why even the most hyper-realistic painting is still just an illusion, a mere hint of what our eyes can experience in real life.

To capture the sensation of seeing a subject, the artist must preserve the feeling of the whole - how every part relates to every other part. This is so easy to destroy as we zoom in and work closely, because we lose context and we forget that the individual parts, no matter how detailed or realistic, are merely supporting roles to the whole effect.


So I try to depict each edge of each shape with only the smallest value and hue shift I can manage. If I copy the big "jump" I see between two neighboring patches, I will destroy the unity of the painting.

------UPCOMING CLASSES AND WORKSHOPS-----------
I teach Classical Realism drawing and painting classes and workshops in my north light San Francisco studio. I also offer workshops at other locations in the US. Please visit my Teaching page for more information and to register!

Saturday
Nov282009

Sterling Boat: Session 8

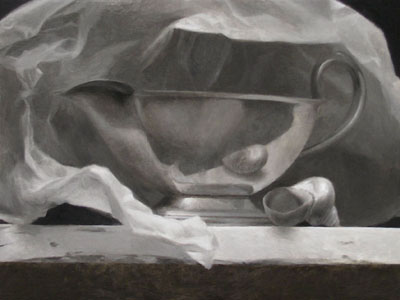
Sterling Boat - DETAIL

Sterling Boat - DETAIL - previous stage
See previous post about this painting here

Today I worked on the wax paper - another 4-hour session. It shows how the wax paper slowly starts to look like transparent crumpled material, instead of only gradations of paint.

Painting is 99% drawing by the way. I never believed it more than I believe it now. If you want to be a better painter, study more drawing. I am amazed by how the same principles I teach the most beginning drawing student are the principles I must hold as my mantra all day every day: Look for the large shapes, bracket the values, work large to small and from shadow up to light...


It even applies to color, because you can't build a believable range of hue without understanding value bracketing.

Drawing is learning when it is appropriate to focus your decision-making on a particular scale: solve large problems first and smaller problems later. Use the problems that appear at a small scale to find solutions to the larger-scale problems.

Learning to draw is the discipline of ONLY tackling the problems you can solve at THIS stage of the artwork, without getting distracted or confused.

I've come to believe that drawing (and artmaking in general) is about organizing your thought process, and nothing else at all.

Wednesday
Nov252009

Sterling Boat: Session 7

Sterling Boat - DETAIL - work in progress
9 x 12, oil on panel

I finally got in a nice long 6-hour painting session today, and it was so exciting to finally be working in color.

It took me a while to get used to painting in color over the more fully realized grisaille (monochrome) underpainting, and after the first hour of working in color today I wiped my work away and had to begin again. But then I started getting a feel for how opaque/transparent to work and everything started to flow.

The photos actually reduces the color a bit (and darkens everything). I repainted the pedistal base of the silver pitcher in color, but in the photo it still looks monochromatic.

Once I get everything to this level of detail, Ill make a final pass with the super tiny brushes, which gives a painting the extra snap of realism. I'll probably spend another 8 sessions or so on this painting.

Now I'm off to cook the dishes I'm bringing to my mom's Thanksgiving spread tomorrow: ratatouille side dish, traditional stuffing, and cranberry sauce...

Happy Thanksgiving!

Sunday
Nov222009

Sterling Boat: Underpainting stage 6

Sterling Boat - work in progress
9 x 12, oil on panel

Today I worked on the wax paper, and although I refined every bit of it, from this photo you can barely see a difference from the last stage. But this level of refinement will really help when I move to the color stage. This session was a little over 4 hours.

Saturday
Nov212009

Sterling Boat: Underpainting stage 5

Sterling Boat - work in progress - DETAIL

Sterling Boat - work in progress - PREVIOUS DETAIL

Sterling Boat - work in progress - DETAIL

Sterling Boat - work in progress - PREVIOUS DETAIL

I worked today on the reflection of the seashell, and also the handle and the spout of the gravy boat.

I ended up redrawing the shape of the handle significantly. I sort of knew the drawing wasn't right when I was working in pencil, but I had wrestled with it a long time and I finally gave up. But when I started refining the paint today, it I realized I couldn't live with the errors and and ended up rethinking all the contours -- which is far more frustrating to do in paint than in pencil. But I'm glad I took the time to do it because the handle now feels more structured and believable.

The spout was much easier, because I worked and worked to get it correct in the previous pencil drawing stage, so it only took about 30 minutes to refine the painting. Which is a good thing, because with the early winter nightfall these days I am always racing to finish the day's work in last few seconds of workable light every evening.

Studio Hours
In the comments of my previous post Rahina asked how long I spend per session. I realized that's a great idea to note, so I'll start mentioning that when I post. Today I spent 4 hours painting. I rarely paint less than 4 hours in a session and I generally aim for 6.

Once I am working I don't look at email or answer the phone and barely take a break at all. But it's almost like being under water, to ignore absolutely all distractions for several hours, and so part of me resists the initial plunge. Once I'm in the studio though, I always wonder what took me so long to get there.

When I am not in the studio I am preparing lessons for my students, looking at blogs of fellow artists, planning my dream studio, writing up course descriptions, shopping for art supplies, preparing submissions to galleries or contests, shipping artwork, and, of course, blogging. I am amazed how much work there is to do for this art life, and it turns out I am the strictest boss I've ever had. But I love it all, so it doesn't feel like work.

Coming soon.....
I have some exciting studio news I'll be announcing in the next few days, so stay tuned!

Friday
Nov202009

Sterling Boat: Underpainting stage 4

Sterling Boat - work in progress - DETAIL

Painting in grayscale at this level of detail feels more to me like drawing than painting... maybe that's why I enjoy it so much.

Wednesday
Nov182009

Sterling Boat: Underpainting stage 3

Sterling Boat - work in progress
9 x 12 inches, oil on panel

I've continued to develop my underpainting. I'm always anxious to jump ahead into the color stage from here, but I am disciplining myself to stay with values for a while longer. It just makes the rest of the painting so much easier if I develop the underpainting as much as possible before moving ahead.

I'm thinking about adjusting my underpainting medium - it dries too fast, and now that I am working on my underpainting longer, I'm realizing I begin to race just to paint faster as the medium dries. It's got more thinner in it than the oily painting medium, and it pretty much sets up in a day. So after 6 hours of painting, my paint begins to get sticky - ugh.

Ecroche in Oakland, California:
There's an amazing ecroche class being offered in February 2010 by Andrew Ameral. The SF Bay Area is so lucky to have Andy, he's returned from teaching at Florence Academy for 7 years. Anyway, ecroche is building a model in clay of a flayed human figure, starting from the bones and layering up through the layers of muscle. I am so hoping to be able to take the class!


--------TEACHING-----------
I am planning my teaching schedule for 2010 so take a look at my teaching page and sign up for my mailing list to be notified when I post new classes and workshops.

Sunday
Nov152009

Sterling Boat: Underpainting stage 2

Sterling Boat - work in progress
9 x 12 inches, oil on panel

Today I worked on the grisaille stage of the underpainting, which is a value-only underpainting. The previous stage uses raw umber and ultramarine to make a neutral color grey, and uses the white of the panel for the lights. This is called an open grisaille, because the white of the panel shows through.

This second stage is a closed grisaille. I use the same raw umber and ultramarine blue for the neutral dark gray, but I also use flake white (cremnitz white) for the lights. When it is done the white of the canvas will not show at all, the surface will be covered by paint.

I used to only paint an open grisaille layer, and then go right to color. But I have found it saves me a lot of time (and anguish) in the later stages of color if I take the time to make a complete value painting in closed grisaille first. The open grisaille is just too transparent and textured to behave well as an underpainting for my needs.

I also spent some time wet sanding this layer with my underpainting medium before I began painting. This removes dust that may have embedded in the previous layer as it dried, and makes it easier to paint on the dry surface. Putting down a layer of medium to paint into is called a "couch".

--------TEACHING-----------
I am planning my teaching schedule for 2010 so take a look at my teaching page and sign up for my mailing list to be notified when I post new classes and workshops.

Friday
Nov132009

Sterling Boat: Underpainting Stage 1

Sterling Boat - work in progress
9 x 12 inches, oil on panel

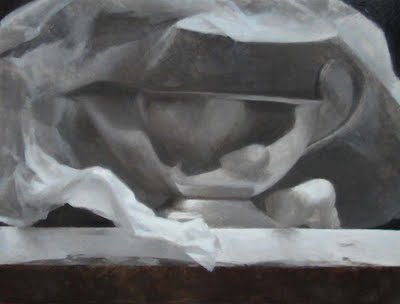
I worked up the preparatory drawing for this painting a few days before I left for my trip to New York, and varnished it before I left, so when I came back to the studio today it was all dry and ready to start the under painting. Might be hard to see yet what it is - it's an antique silver gravy boat and a seashell perched beneath a 'wave' of wax paper.

I'm not videotaping this painting like I have previously, but I took photos while painting today. The first layer of under painting is just quickly roughing in all the values, I spent about 3 and a half hours today. Today is probably the only day I'll cover the entire surface in one painting session.

stage 1
The initial contour drawing took about 8 hours over 2 days. I started the basic block-in drawing on trace paper but completed the final refined linework directly on the gessoed panel. Then I varnished it with a mixture of damar, turp, and a tint of titanium white to seal the drawing and the porous gesso surface. This makes a nice surface to paint on - not too thirsty, not too slick - and also prevents the graphite pencil from mixing with my first layers of paint.


stage 2
I start the underpainting in the darkest black areas and work in steps up to the lightest lights.

stage 3

stage 4

stage 5
The painting is still rough and brushy at this stage. The paint texture is hard to control at this point, and I'm just massing in values, so I try not to spend too much time worrying about unwanted textures.

--------TEACHING-----------
I am planning my teaching schedule for 2010 so take a look at my teaching page and sign up for my mailing list to be notified when I post new classes and workshops.

Wednesday
Oct142009

Two Small Paintings

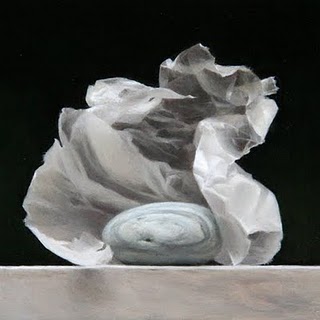
Beach Stone and Wax Paper
oil on panel
5 x 5 inches

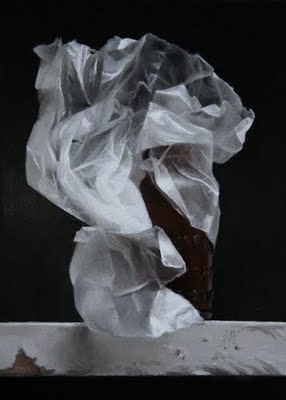
Wrapped Bottle
oil on panel
5 x 7 inches

See preparatory drawings for these paintings here.

I finished these 2 small paintings today just in time for my open studio this weekend! It was fun to work small, I'm hoping to do a whole series of these.

My studio here in San Francisco will be open to the public this weekend:


October 17-18
11am-6pm
Carl Street at Cole Street
N-Juda MUNI line

Public transportation highly recommended as my street will be CLOSED to cars for a block party on Saturday.

Hope to see you there!

Monday
Sep282009

Wrapped Silver Goblet: FINAL


Wrapped Silver Goblet
11 x 14 inches
This painting will be showing at the Open Studios Exhibition at the SomArts gallery here in San Francisco October 3- 29. Come see the exhibit at one of these two events:
Private Preview Gala, Saturday, October 3, 2009 (ticketed event)
Exhibition Opening Reception, Sunday, October 4, 2009 (free event)
More info at ArtSpan.org


I'll be teaching two workshops on still life painting in summer 2010, one here in the San Francisco Bay Area and one in Florida. Details to follow soon!


Thursday
Aug062009

Outdoor Art Materials

I was just reading the comments in James Gourney's nice writeup for the Fellowship and realized I learned a lot about materials for outdoor painting during the trip and I thought I'd share.

Outdoor easel setup
Just about everyone was using a paint box palette mounted to a photographer's tripod for their plein air setup. (Some people preferred a light metal easel to mount their canvas and then held their palette in their hand, but there's so much to do with the non-painting hand outdoors - like swat mosquitoes - that I prefer a mounted palette).

Guerrilla Pochade Box
I started out with my 9"x12" Guerrilla box which has served me well on previous neighborhood plein air sketching but I quickly found it is too heavy and boxy for anything beyond a 10-minute hike. Considering I was climbing steep slippery rock steps most days to my waterfall site, I was really wishing for a lighter option. The plus side of the Guerrilla box is that it is extremely functional and sturdy and has tons of room for storing things. And its very cute boxy proportions draw lots of compliments. Emily Lee had the even cuter 6"x8" version and she was really happy with it, but you can see she sometimes had to use a handheld palette because the paint-mixing area is tiny.

Alla Prima Pochade
Everyone oohed and aahed over this nifty, well-designed box when it was shipped to Fellow Dorain Iten. The components are held together with magnets and the nice wood and beautiful design is eyecatching. He really liked using it, especially for the magnet that holds your palette knife while you work. The full version has awesome drawers and there is a "light" option that has separate storage compartments that attach with magnets, but even the light option still seemed a bit heavy for me.

Open Box M
Our instructors all used the "M" and after deliberating quite a while this is the option I decided to upgrade to. It's very expensive, but they offer a less expensive "kit" that includes a shoulder bag instead of the outer wooden box. However, I've personally found it very annoying to hike with a shoulder bag flopping over my arm. A backpack is the way to go.

After spending quite a bit of time on the site I finally figured out you can buy the palette/panel holder separately from everything else. I decided to order that alone, at 9"x10" and $195, and if I really feel the need I'll buy the wet panel carrier box separately later. Those two options even separately are less expensive than the kit that includes the shoulder bag - and much less expensive than the whole set which includes a wooden outer box. In the meantime, I'll use these lightweight "cocoon" wet panel carriers.

UPDATE: Lines and Colors posted a complete and detailed review of all the pochade box options available, be sure to check it out before you invest in one! It seems that Charley Parker went with the Alla Prima Pochade, it certainly looks like an amazing box. I'll come back and post and update later about how I like working with the Open Box M.


UPDATE 2: HRF Fellow Peter Sakievich posted a photo and description of his Open Box M setup on his blog.

Julian Umbrella
We all were jealous of Nick Hiltner's huge white umbrella that shielded him from rain, sun, and even more importantly... curious passersby! Several of us ended up ordering them and having them delivered directly to our location in the Catskills. Nick warned us that every part of the umbrella breaks often, but there really are no other options for white artist umbrellas we could find, and he said the manufacturer is willing to replace broken parts. Sure thing, the clamp contact has popped off, the umbrella has detached from the clamp (both luckily fixable on the spot) and after a week 3 spines had detached from the nylon. I reinforced every spine connection with duct tape so mine is not so pretty any more. All that said, it is a fantastic umbrella - it kept me dry even during one epic 3.5 hour downpour painting session. The white material casts perfect, diffused lighting on my canvas under all light conditions. And the most important feature... only the most brave passersby dare peek under the huge umbrella.


Camp Chair
I started out with the tiniest, lightest, overpriced at $20, 3-legged camp stool from REI, and in about 30 minutes realized it is miserable to sit on and has a bad habit of tipping. I "upgraded" to a folding, armless camp chair for $13 at the local hardware store. But I and everyone else who bought that one found that the seat and/or back canvas tore from the supports after a couple weeks of all-day painting sessions. The most hardcore of our group were lugging around full camp chairs with armrests which seemed like overkill to me, till I saw how nicely their umbrellas clamped to the arms, and how their turp jars nestled in the mesh cup-holders! So I might be upgrading to a fancy camp chair.

Painting Panels
I have been using wooden Art Boards in my studio and Gessoboard panels outside for a couple years now, but recently I'm finding I prefer a fine grade oil primed linen surface for outdoor painting (indoors I'll still use smooth wood for the most detail). I tried these:

Art Board oil primed linen 9"x12": $17.89
I liked the silky fine surface of these panels, but I found the damp conditions I was painting in made the panels warp forwards slightly. They will be fine once framed, but the warping was annoying on a multi-day painting.

Utrecht Master's oil primed linen 9"x12": $9.99
This panel is ok quality for a cheap price, and it's probably perfect for single-session plein air artists who like texture and thick paint. However, for multi-session painting with thin paint and more detail, this canvas has way too much texture.

New Traditions oil primed linen with gaterfoam 9"x 12": $10.17
Our instructors were using New Traditions and although I have not used them yet (just ordered my first batch) I was sold on their texture, lightweight archival gaterfoam core, and non-warping properties. And the price is right! You can choose different support materials and different finishes, but the portrait grade lead oil primed linen was my choice.

Tripod
I borrowed Dorians' tripod briefly but I loved it and hope to buy my own. The grip to move the ball head in any direction was easy and smooth and the tripod was really sturdy and even a tiny bit lighter than mine. It's the Manfrotto 190XPROB and Horizontal Grip Action Ball Head. It's expensive though, I might be waiting quite a while before I upgrade to this. There are much cheaper and lightweight tripods, and as with all things plein air the choice is between something durable/heavyweight versus something lightweight/flimsy.


Sunday
Aug022009

Hudson Fellowship Final Post: SOLD

Sunset in the Catskills (SOLD)
9 x 12
oil on linen

Saturday
Aug012009

Hudson Fellowship Day 26


Tree Color Study
9 x 12 inches
oil on linen panel

What a day - up and out in the field by 7:30am, quick run home for a 30 minute break at midday, then back to the field till 4:30. At 7:30 we'll go out again for a final attempt at a sunset study. We're trying to cram in one last good long workday before we leave tomorrow. Best part is it's been warm and sunny all day, and the puffy cumulus clouds rolling by all afternoon are indicating a killer sunset to come.

The painting above is my continuation of the painting I started a couple days ago. Later I moved into the shadow of the same tree to do a close-up drawing of it's awesome tangle of branches coming off the trunk (below).


Last, I did this little sketch of Emily under her white umbrella as she painted in a field of purple wildflowers under billowing cumulus clouds.

Emily en Plein Air
oil on linen
6 x 8 inches

Next up, dinner and then a final attempt at a sunset sketch. I'm really not looking forward to the sunset session as I have officially run out of bug repellent...

I probably won't have time to post again for a few days, as I plan to jump in the car early tomorrow to start my 4-hour drive to Pennsylvania where I'm meeting up with my husband before we fly together back to San Francisco in a few days. Thanks to everyone for following along, it's been a really intense month and I've appreciated all of your well-wishes.

Thursday
Jul302009

Hudson Fellowship Day 24

Tree Color Study
9 x 12 inches
oil on linen panel

Yesterday was a washout - got all set up to work, only got a couple hours into it, and the rain came down so hard everything turned grey/white and we had to call it a day. Today Kaaterskill falls was swollen beyond recognition - majestic and exciting, but not at all like the peaceful terraced pools in the study I am working on, so a couple of us decided to head for high ground and do a tree studies instead. Had a great time with the above painting - and wow it's nice change to be out in the sunshine instead of hunkered down in the chilly mist of the falls!

Tomorrow it's a tossup: the plan is to check out the falls and if we decide the waters are still too rambunctious we'll head for the high warm plateau with the lovely trees again.

Only two more full workdays to go....

Tuesday
Jul282009

Hudson Fellowship Day 22

Kaaterskill Lower Falls Value Sketch
(work in progress)
9 x 12 inches
oil on linen

This is the same basic composition I did a couple days ago in color. I decided I need to do a detailed value sketch if I am going to flesh this out into a larger, finished painting. I started with an "open grisaille" yesterday using burnt umber and turpentine (called "open" because the white canvas shows through). Today I started to refine it as a "closed grisaille", using white paint, burnt umber, and ultramarine (called "closed" because when it's done the canvas will be covered with paint).

Pool Study (work in progress)
6 x 8 inches
oil on linen

I also started a color study close-up of the pool of water at the bottom of my composition. This is still really unrefined, I wanted to take it further today but I'm using a new type of canvas panel and the wet paint does not stick well when I try to add more layers. I'll be able to take it further another day once the paint has set up a bit.

We're starting to wind down to the end here, just a few more days of study here in the Catskills before we all go back to our respective studios. The last day of the Fellowship is this Sunday, August 2; I can't believe it's going by so fast!

Monday
Jul272009

Hudson Fellowship Day 21

Will post more art soon but for now here's a little video of me and Fellow painter Ken Salaz painting in a rainstorm today:


Also, here's a great image of another Fellow, Jennifer Worsley painting under her white umbrella at the top of Kaaterskill Falls:


Saturday
Jul252009

Hudson Fellowship Day 19

Katerskill Lower Falls Color Sketch
9 x 12
oil on linen

We had a huge thunderstorm last night and as a result the falls were the highest and fastest I have seen them. Recently they'd slowed to almost a trickle in some places. I feel like this section of the falls has become my own studio. I've walked over every one of the rocks here many times now and I know several bends of the river pretty well. When hikers decide to wade in the pools and climb on the rocks, I feel like strangers have wandered into my studio and are touching my props.

Above: Block-in line drawing and first part of color wash.

Above: Thin color wash, consistency of watercolor.

Above: Refining blocks of color and shapes, adding details.

Above: Added details and adjusted colors and values.

Friday
Jul242009

Hudson Fellowship Day 18

Kaaterskill Boulder and Pool (work in progress)
9 x 12 inches
oil on panel

The background is still not done, but I made a lot of headway today working on this painting I started a couple days ago. I'm finding I've had to re-learn what I have already learned in my studio work:
  1. Slooooow waaaaay doooooown.
  2. Mix up puddles of the main colors and values with a palette knife before working with the brush.
  3. Look, look, look... only put down one single stroke and then look back again at the subject.
I know all this so well from my studio work, but somehow outdoors I feel I should be able to get away with slap-dash dabbling. Anyway, it's starting to sink in: I have to be calm and slow and look, even outside. It seems simple, but between the mosquitoes buzzing in my ears, the cold breeze chilling me to the bone, and tourist hikers snapping my photo every few minutes, I have apparently been distracted from everything I thought I knew. Glad it's starting to come back, had a lot of fun today.

PS: For more about this year's Hudson River Fellowship, visit the official blog at:

Thursday
Jul232009

Hudson Fellowship Day 17

Kaaterskill Boulder with Falls
9 x 12 inches
oil on panel

Eight more hours spent on the boulder study today and I think it's done.