Search this Blog
Sadie's Blogs and Website

For posts 2006-2010
please visit
sadievaleri.blogspot.com

Sadie’s current site is at
SadieValeriAtelier.com

UPDATE February 1, 2021

I have recently discovered that unfortunately this Squarespace blog has failed to maintain most the images for older posts on this blog. Luckily, the original Blogger version is still live at sadievaleri.blogspot.com and all the posts and images from 2006-2010 are still visible there.

For my current artwork, teaching, and blog please visit Sadie Valeri Atelier.


Entries in Studio Escalier (4)

Friday
May092008

Studio Escalier Workshop: Final Drawings

Sarah Twice
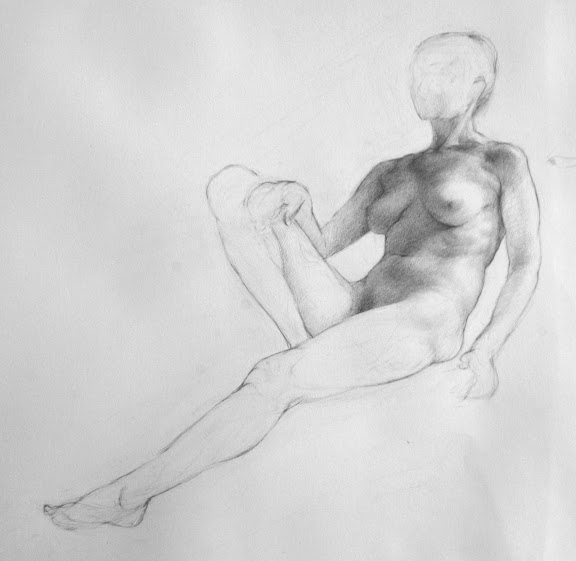
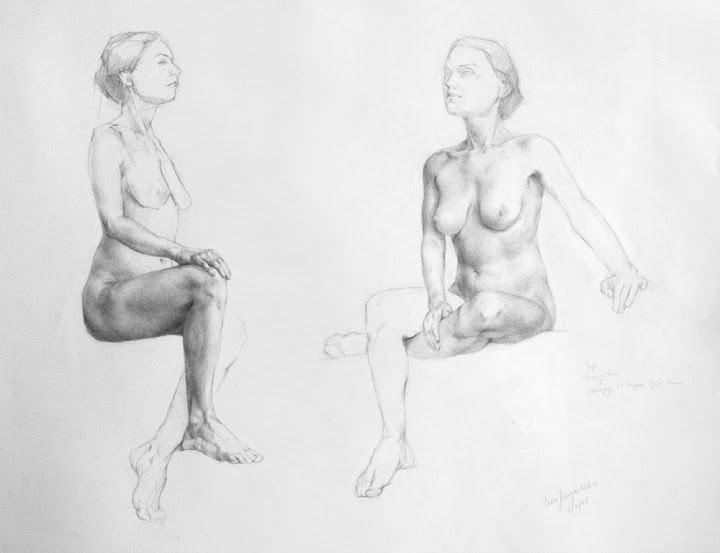
18 x 24, graphite pencil on paper
9 hours each drawing

For our final week at Studio Escalier's Drawing Workshop in Paris we worked on two long poses to practice all the contour and modeling lessons we have been learning from Tim and Michelle - one pose in the mornings and one pose in the afternoons. I decided to put both my final drawings on the same sheet of paper - just a bit of extra challenge for fun.

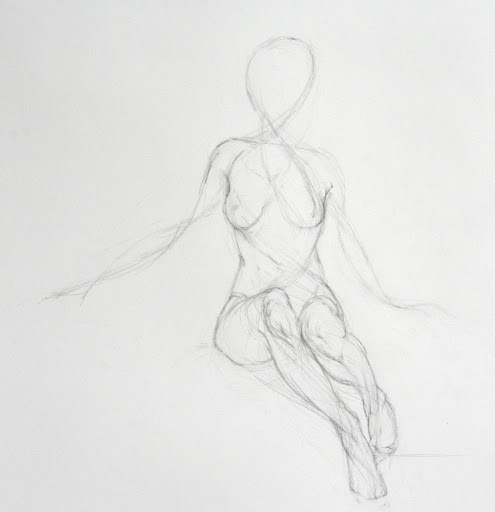
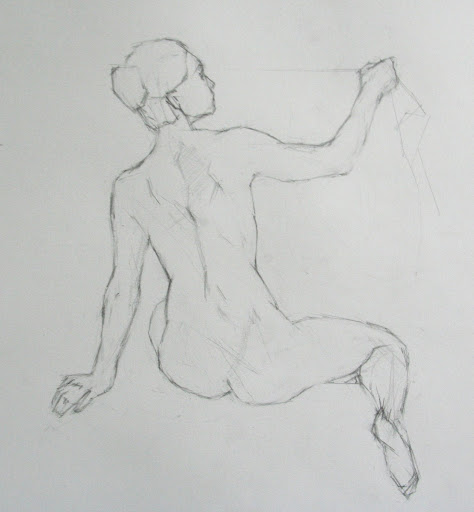
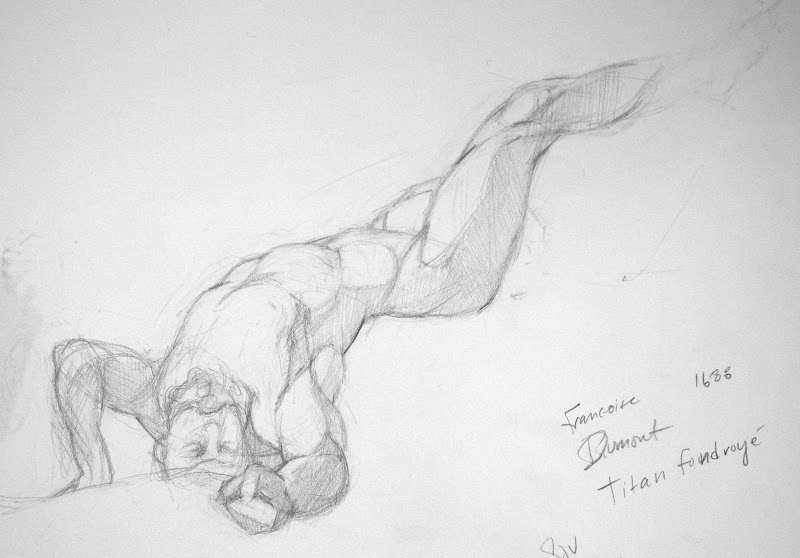
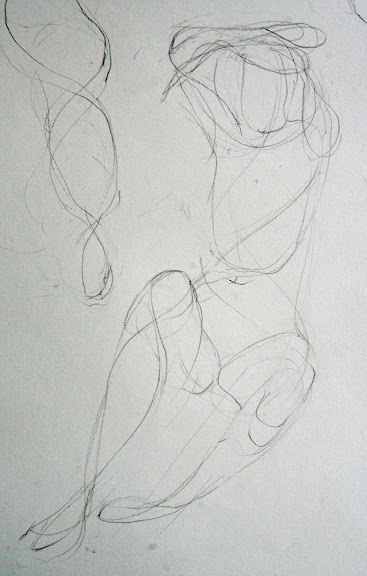
Here's a slideshow of the stages of the drawings

I had critiques with both Tim and Michelle. Their comments were really helpful and give me a lot to work on for my future drawings:

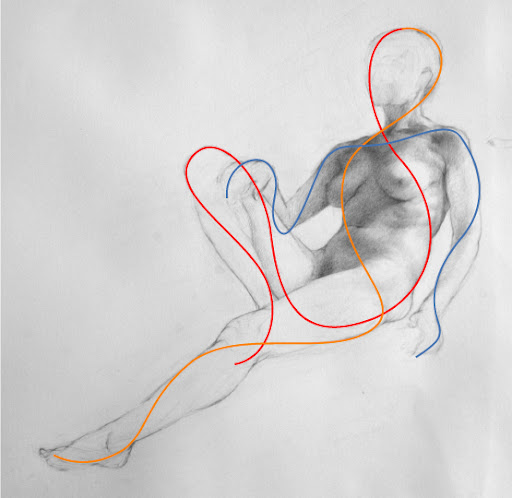
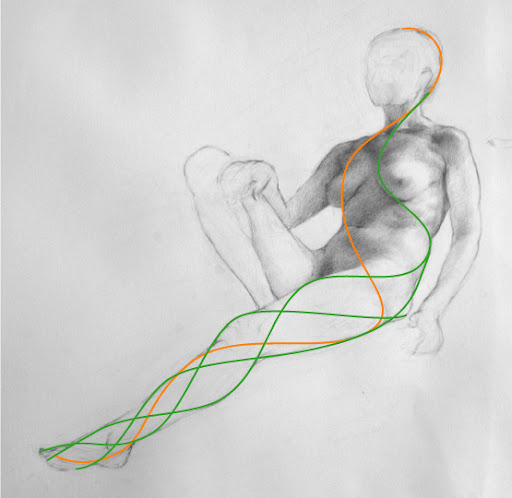
I need to think about "packing the form" - the human body is made of irregularly shaped packed forms arranged on curves. I need to remember to define the top edges of those forms, the edges facing the light, as much as the bottom edges, the edges facing away from the light.

Also, in both these drawings I've over-modeled in the light. All the darkest shadow is on the side of the model turned way from me, so almost everything I saw was in the light. In my zeal for modeling form I made everything too dark.

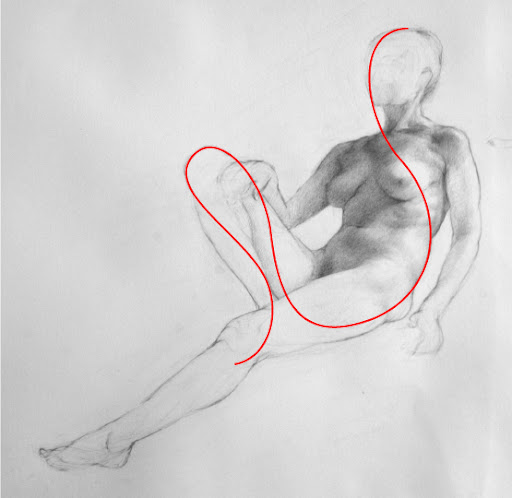
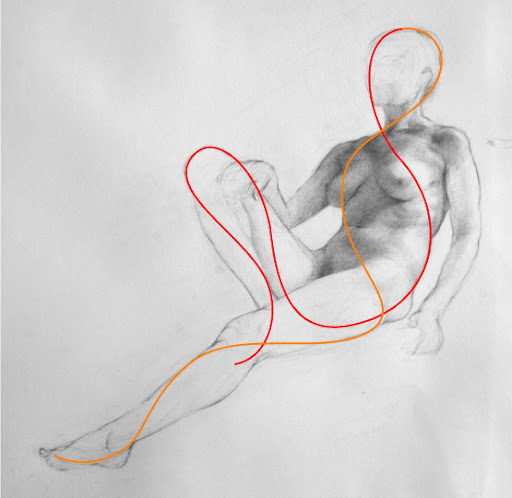
I also need to practice seeing the forms arranged in fans arcing off of changes of direction on the contour.

Finally, I need to emphasize structure and solidity, otherwise my approach with soft gradation tends to look too wispy. I agree. I am not interested in making pretty drawings, I want to make strong drawings.

Not only have I learned a lot about drawing from this workshop, but also my expectations for myself have been raised in the process. I have a vision for how well I will someday be able to draw, a vision for how I could draw with a lot of practice and investigation, and it's far more developed than I ever expected of myself before.

Wednesday
Apr302008

Studio Escalier Workshop Day 8

tonal study, pencil on paper, 6 hours

(detail of above)

Day 8 of my workshop at Studio Escalier in Paris.

This is a drawing of a 6-hour pose. Yesterday for the first half I focused on the inner movement curves, the block-in, and finally the detailed contour. Tim and Michelle are teaching us to think of the contour three-dimensionally. So I am thinking of the contour wrapping around the body, moving towards and away from me.

I've taken my drawing into Adobe Illustrator and used the software to recreated my original inner movement curves to diagram the process I am learning:

As Tim teaches the technique, we draw three interrelated movements:

We start with the theme, which is the fundamental inner movement curve. The theme starts at the crown of the head, and flows down the center line of the face, down to the big toe of the standing leg, or the leg holding the most weight.

This is a precise curve, it describes specific points on the body and the relationships between these points. (In contrast to simply "expressing" the movement. This is a record of what we see and know about the body, it's not exaggeration or expressionism.)

The second line we draw (above) is the countertheme - the orange line. It's a secondary inner movement curve that travels from the top of the head, wrapping around the body the opposite direction and down the non-standing leg.


Third, we draw the ornament (above). This is the third interrelated movement. As with the theme and countertheme, the ornament wraps around the forms, moving side to side and back to front.

All of the curves wrap around the body three dimensionally. Above is the same countertheme curve, but I've created dotted segments to show where I am imagining it wrapping around the back side of the form. (I do not modify the figure to fit these curves, it's amazing the interrelations it's possible to see once you start looking this way.)

Above I've shown how adding more and more interrelated movement curves begins to describe the form. As I get more and more detailed with my contour line, I can see how every form on the body follows this wrapping helix pattern.

It's interesting to recreate the curves in Adobe Illustrator. The program creates Bezier curves that have a certain mathematical tensile force, and you have to learn to manipulate them to create flowing curves without awkward bends. The behavior of of Bezier curves is amazingly conducive to the Inner Movement Curves - it was shockingly easy to recreate the curves with the software. I have a feeling there is an implicit relationship between the cohesive, efficient, and functional forms of the body and mathematical curves.

Update added 5/03/08
Bezier was a 20th century French draftsman! Wikipedia has a great entry on Bezier curves, and near the bottom of the page you can see elegant animations for how Bezier curves are calculated.

After spending so much time on the contour, I moved on to the tonal value shading. I was surprised how quickly the value study progressed. I think learning the contour with this method gives me a deep understanding of the three dimensional figure, so flowing the light across the form is easier.

I'll end with a quote from Tim:

"I think the idea of theme, countertheme and ornament has the power to revolutionize the way you think about the figurative subject, to really marry your eye to your gut to your mind to your hand, and liberate your imagination."

I agree.

Wednesday
Apr232008

Studio Escalier - Drawing Movement

Afternoon Pose, pencil on paper

I'm practicing drawings based on the "inner movement curve" method in my class at Studio Escalier, and today I really felt something click.

This drawing feels more solid, more believable than my previous drawings. I feel like I am suddenly seeing the relationships between all the parts as a whole, and feeling the three dimensionality of the pose. It has everything to do with what I studied with Ted Seth Jacobs, but Tim Stotz's emphasis on movement is making Ted's teachings come together for me. (Tim was a student of Ted's, so no wonder).

The drawing above started with this drawing of the interior lines of movement:

Afternoon Pose, Phase I

The first gesture lines aren't much to look at. In fact they look somewhat random and loosey-goosey. But it's actually quite precise. They correspond to very specific points I see on the body - and more importantly, the relationship between those points.

Next I started fleshing out the drawing, starting with the legs and drawing more and more inner movement curves to create the full line drawing. The outside curve of the knee has everything to do with the interior angle of the ankle. Everything wraps around and appears again in a logical place.

Afternoon Pose, Phase II

Once I started seeing all the relationships it became like a treasure hunt to find more. They are everywhere, all the way out to the fingertips and I am sure down to the tiniest tissue structures.

Afternoon Pose, Phase III, final

In contrast, this is the drawing I did in the morning, when I was really struggling with the concept. I think you can see it does not have the same energy as the afternoon drawing.

Morning Pose

Studio Escalier has arranged several evenings for us to draw at the Louvre from the sculpture gallery. Tonight was the first night, and it was incredibly exciting to see all the sculptures so powerfully describing the same concepts we have been studying.

This is my drawing of a 30-inch marble sculpture by Dumont, done in 1712. It was in a room full of similar small-scale sculptures, which Tim explained were the final thesis projects which students of the 18th century French sculpture academy had to submit in order to graduate and go on to be professional sculptors. These small works represent the pinnacle of the art of figurative sculpture.

The figure has a clenched fist thrust directly at me... I don't know why I choose such a difficult view. But it made me interested to do more hand studies.

By the way, the Louvre website is amazing. I just found out you can browse the entire collection, room by room. I found the room we were drawing in today here.

Tuesday
Apr222008

Studio Escalier Drawing Workshop

Pencil on paper, 2 hours

Pencil on paper, 5 minutes

These are a couple of my first drawings done at Studio Escalier in Paris this week.

Tim Stotz has us focusing on "inner movement curves" to establish the proportions, instead of using the straight-line block in. Also, we are doing 5-minute to 2-hour drawings. Both are very foreign to me after a year if doing 20-40-hour block-in drawings. But it's a good approach for me to practice and I'm enjoying a more responsive and less analytical way to draw.